Overview
A payment processor must be setup in order to accept checks and/or credit cards on line as a form of payment. If a payment processor is not defined, the store cannot accept credit cards or checks unless manually authorizing them.
Once a payment processor company is selected, the company will provide the information necessary to complete the required fields.
Note: If the payment processor company X-Charge is being used, they require swiped data and therefore a credit card swiper will be needed. (See X-Charge Processor Setup for further details.)
If credit card swipers are being used, the following guidelines must be used when setting up the hardware:
Prefixes can not include any numeric values
Suffixes are not allowed
Start Sentinels for the beginning track information must be "%"
Start Sentinels for the secondary track information must be ";"
End Sentinels for all tracks must be "?"
If using multiple track reading, carriage returns are not allowed between the track information
(See Workstation Setup documentation for further information on setting up credit card swipers.)
Steps: Payment Processor Setup
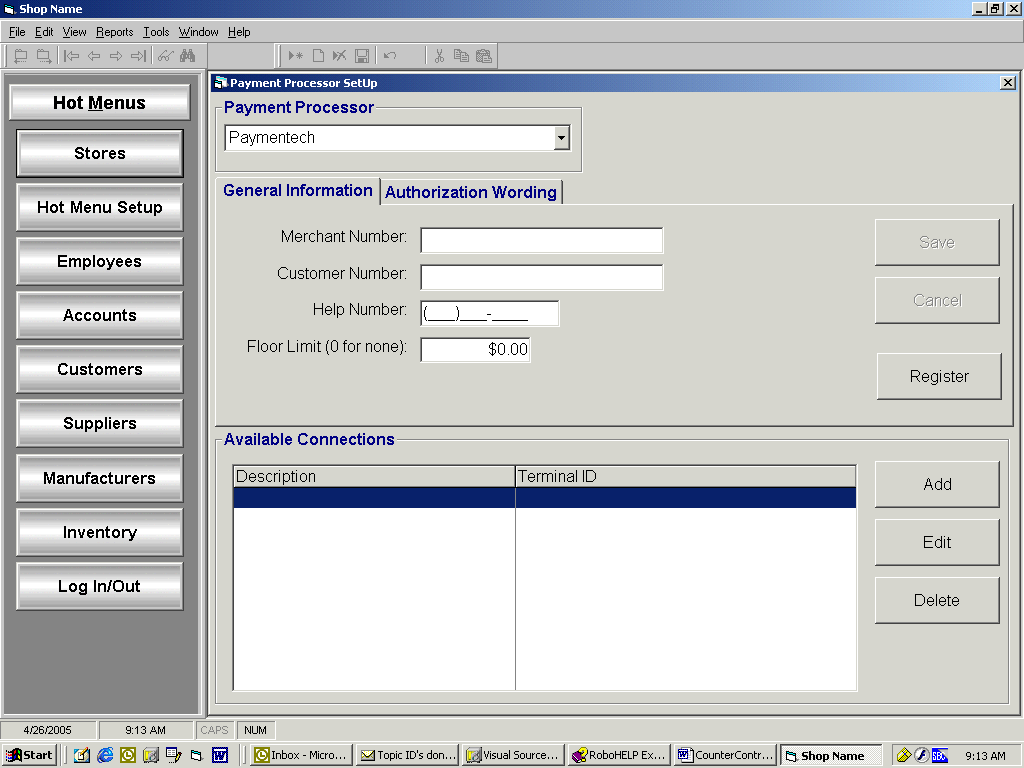
Access the Payment Processor Setup screen by clicking on:
Tools | System Setup | Payment Processor Setup

Payment Processor: Select the payment processor company from the list of currently available processors. (If selecting X-Charge, see X-Charge Processor Setup for further details.)
General Information tab
Merchant Number: This number will be supplied by the selected payment processor company.
Customer Number: This number will be supplied by the selected payment processor company.
Help Number: Enter a phone number that can be used to contact the payment processor company when a transaction is taking place, an error occurs, or a message appears requesting the user to call in.
Floor Limit (0 for none): Enter the maximum dollar limit for each transaction.
Once all the fields on the General Information tab have been completed, click on the Register button.

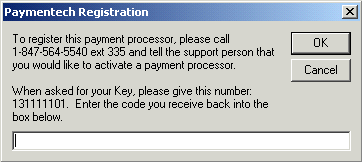
Call the SBC phone number listed on the screen and notify them that you would like to activate a payment processor. After giving the support person the key number listed on the screen, they in turn will give you a code to enter in the box.
Note: The Key number listed on the screen will change each time the registration screen is accessed, but you will only need to register once.
A processor must be registered in order to proceed at Point Of Sale with any pay types using that processor.
Authorization Wording tab
If applicable, modify the default message that will appear on the credit card agreement receipt (merchant receipt) that is signed by the customer. (Note: the message can be up to 4000 characters)
Click Save to retain the modifications.
Click Cancel to remove the modifications.
Available Connections
The following message box will appear if a connection is not established for the PaymentTech or TeleCheck processor. (Note: Connections are not required for the X-Charge processor.)

Click Add to add a new connection.
Click Edit to modify an existing connection.
Click Delete to remove an existing connection.

Add / Edit Processor Connection
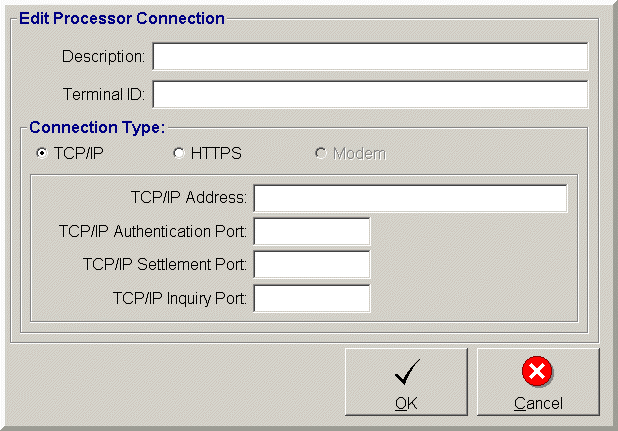
Description: Enter or modify a description to identify the connection.
Terminal ID: This value will be supplied by the payment processor company.
Connection Type: Select the applicable connection type of TCP/IP or HTTPS.
If TCP/IP is selected, the following fields must be completed with the information supplied by the processor company:
TCP/IP Address
TCP/IP Authentication Port
TCP/IP Settlement Port
TCP/IP Inquiry Port
If HTTPS is selected, the complete the fields as listed below:
Host Address: This field is defined in the LINEHANDLER.PROPERTIES file and will not be filled in on this screen.
Host Port: This field is defined in the LINEHANDLER.PROPERTIES file and will not be filled in on this screen.
User Name: Complete with the information supplied by the processor company.
Password: Complete with the information supplied by the processor company.
Click OK to save changes or click Cancel to remove changes and return to the Payment Processor screen.
Steps: X-Charge Processor Setup
In order for the X-Charge Processor to function properly, the X-Charge Server must be installed on the server machine. (Note: The installation data and instructions are available through the X-Charge.)
Once the installation is complete, a folder named LocalTran will be automatically created and placed on your machine. This folder will be used for X-Charge to communicate with the CounterContol system.
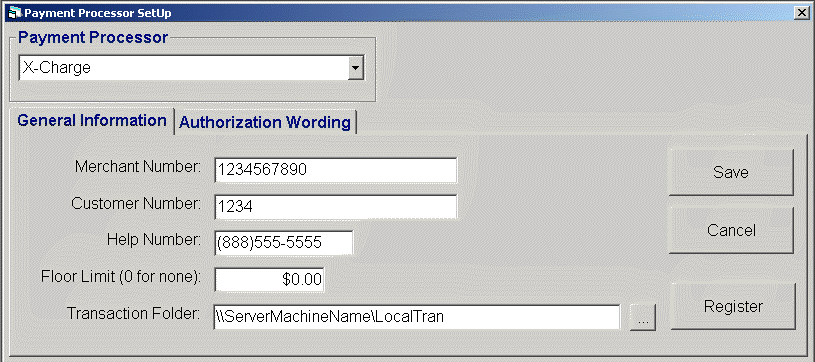
In order to enable the communication process, the path name for the LocalTran folder must be stored in the Transaction Folder field on the Payment Process Setup screen.
LocalTran folder:
This folder must have read/write ability for all users.
This folder must be shared if you have multiple client machines using X-Charge.
To enable the communication process for multiple client machines, enter the fully qualified shared path name for this folder in the Transaction Folder field on the Payment Process Setup screen.
Note: A mapped drive can also be setup so that all machines can store a shortened common path in the Transaction Folder field on the Payment Process Setup screen. If mapping a drive, we recommend mapping to drive X.
Note: Please see your System Administrator for information on how to share a folder, map a drive or set read/write ability.
Example:
