Overview
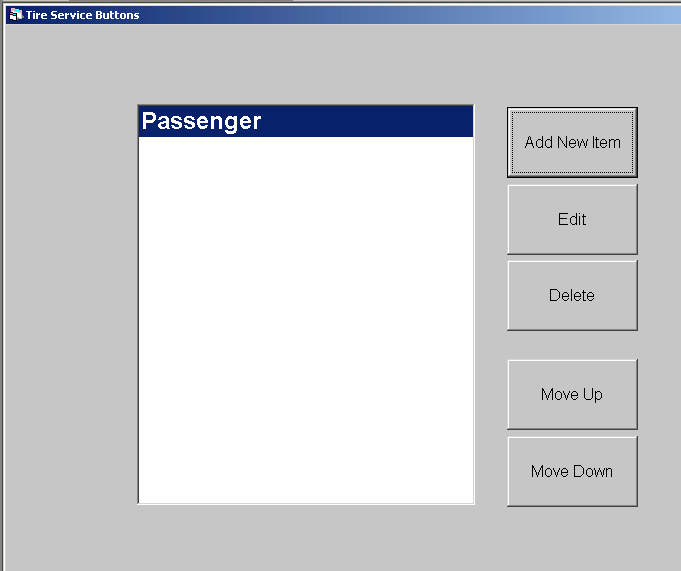
The Tire Service Buttons function allows the user to customize up to four Tire Service Package buttons that will come up when an inventory item with a Detail Type of Tire is sold.
Each Tire Service Package button is given a customized caption name and can contain up to 4 Inventory Item buttons; the Inventory Item buttons are also given customized caption names.
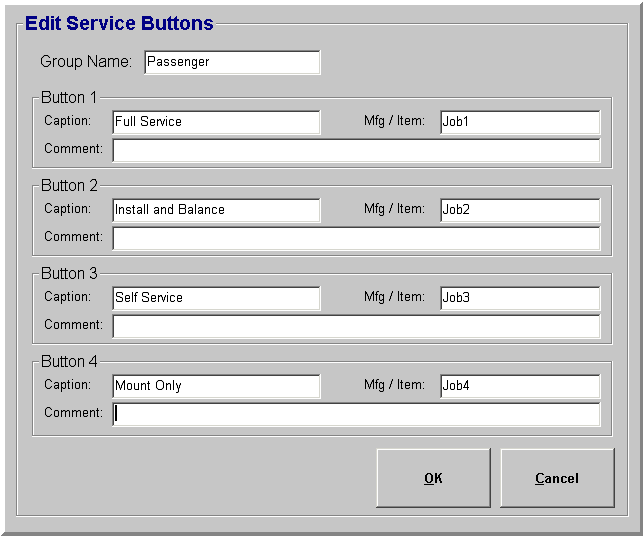
For example, Tire Service Package buttons names may be created for Passenger, Truck, Light Truck, and High Performance. The Inventory Item buttons for the Passenger Tire Service Package may include Full Service, Install and Balance, Self Service and Mount Only.
Steps: Tire Service Buttons
To define the Tire Service Package buttons and corresponding Inventory Item buttons, click on:
Tools | System Setup | Tire Service Buttons

Click Add New Item to add a new Tire Service Package button and corresponding Inventory Item buttons or click Edit to modify an existing Tire Service Package button.
Edit Service Buttons screen:

Group Name: Enter the button caption for the Tire Service Package. Once this information has been saved, the button caption name will appear on the Tire Service Buttons screen.
Add up to 4 buttons containing the following information:
Caption: Enter the button caption for a Tire Service Package item.
Mfg/Item: Enter the inventory item number for a Tire Service Package item.
Comment: Enter a comment, if applicable, for a Tire Service Package item; this comment will appear on the ticket.
Click OK to save changes.
Click Cancel to cancel changes and exit the screen.
Click Delete to remove an existing Tire Service Package button.
Highlight a Tire Service Package button name and click Move Up/Move Down to change the placement order of the buttons. Note: The button name at the top of the list will automatically open in POS when a tire is sold; the Tire Service Package that is most commonly used should be moved to the top of the list.