Open the GL Chart of Accounts screen by selecting:
Tools | System Setup | General Ledger Setup | Chart of Accounts
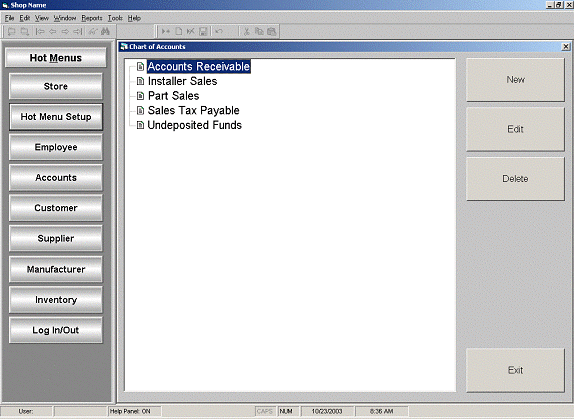
The options are New, Edit, or Delete an Account.
For the documentation example, we have added the five accounts displayed in the print screen below. Accounts will be listed in alphabetical order regardless of the order in which they are entered. The screen below will illustrate how the account Installer Sales was added.

To EDIT an existing account, highlight an account and click Edit.
Modify the account and click Ok to save the change or click Cancel to cancel the edit process.
To DELETE an existing account, highlight an account and click Delete.
A warning message will appear: Are you sure you want to delete the selected item? Click Yes to delete the account from the Chart of Accounts, or click No to cancel the delete function.
Click Exit when finished.
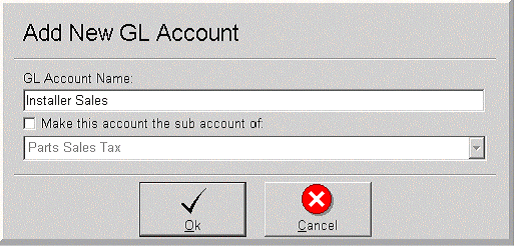
Select New and the system will display the Add New GL Account screen.
Enter the new account name in the GL Account Name field.
If this is a sub account, click the check box and select the primary account from the drop down list.
Click Exit when finished.
In this example, we added the account name Installer Sales. In the GL Account Name field, type in Installer Sales and click Ok to save the new GL Account. The account Installer Sales will now appear in the Chart of Accounts list box.
